End of tenancy cleaning Whetstone N20 flat checklist
Posted on 29/08/2026

Moving out of a flat in Whetstone N20 can feel like one long to-do list, and the cleaning bit is usually the part people leave until the end. That is where trouble starts. An end of tenancy cleaning Whetstone N20 flat checklist gives you a clear way to tackle every room, every surface, and every detail the landlord or letting agent is likely to notice. Done properly, it can help you reduce disputes, avoid last-minute panic, and leave the place looking tidy, fresh, and ready for inspection.
Whether you are a tenant trying to protect your deposit, a landlord preparing for new occupants, or a property manager wanting a smoother handover, the aim is the same: a thorough clean that stands up to check-out expectations. Below, you will find a practical guide, a room-by-room checklist, common mistakes, and a realistic view of when professional help makes sense. Let's make this manageable, not miserable.
Why End of tenancy cleaning Whetstone N20 flat checklist Matters
End of tenancy cleaning is not just a "good idea" clean. It is the final reset before keys are handed back, and in a flat it usually means dealing with compact rooms, awkward corners, built-up kitchen grime, bathroom limescale, and dust that seems to live behind radiators for fun. In Whetstone N20, where many flats are managed through agents with fairly exacting move-out expectations, the standard can be stricter than people expect.
A good checklist matters because it turns a vague task into a measurable process. Instead of wondering whether the oven is clean enough or whether the skirting boards have been wiped, you can work through a structured plan. That makes the job faster and far less stressful. Truth be told, most deposits are lost not because one thing is catastrophically dirty, but because several small things were missed.
It also matters because check-out inspections often compare the property against the condition at move-in, normal wear and tear aside. If you have ever walked into a flat and noticed sticky cupboard shelves, dusty light fittings, or a shower screen with old water marks, you already know how easily small issues stand out. A checklist helps you stay ahead of that. No drama, no guesswork.
How End of tenancy cleaning Whetstone N20 flat checklist Works
At its core, the process is simple: clean from top to bottom, dry to wet, and least dirty to most dirty. The checklist breaks the flat into zones so you are not running around in circles. For example, you would not deep-clean the kitchen floor first and then track dust across it while wiping cupboard tops. That sounds obvious, but when you are tired and halfway through packing, obvious things get missed.
The cleaning typically starts with removal of personal items, food, toiletries, and clutter. Then you work through the rooms in a logical order, often beginning with bedrooms and living areas before tackling the kitchen and bathroom. In a smaller N20 flat, that may mean doing everything in one long day. In a larger split-level flat, it might mean a two-stage approach, with the first stage focused on decluttering and the second on the actual deep clean.
If you hire a professional service, the checklist still helps. You can use it to confirm what is included, identify any extras such as carpet cleaning or upholstery care, and spot items that need special treatment. That is especially useful where there are delicate surfaces, older fittings, or stubborn marks from everyday use. The cleaner the communication, the smoother the handover.
Key Benefits and Practical Advantages
Using a proper checklist is not only about avoiding deductions, although that is the headline benefit for many tenants. It also gives you structure at a time when the moving process is already messy enough. Here are the most useful advantages.
- Less chance of missed areas: A checklist keeps attention on the details that get forgotten, like extractor fans, limescale around taps, and the inside of drawers.
- Better deposit protection: A thorough clean helps you meet reasonable check-out expectations and reduces avoidable disputes.
- Faster cleaning: You waste less time deciding what to do next, which matters when you are under pressure.
- Clearer communication: If you are using a cleaner, you can explain what needs doing and what does not. Handy, really.
- More confidence at inspection: There is a noticeable difference between hoping the place looks clean and knowing you have ticked everything off.
For landlords and property managers, the benefit is equally practical. A clean, presentable flat is easier to remarket, photographs better, and feels more welcoming at viewings. And if you are also coordinating other services, such as end of tenancy cleaning support or a broader deep cleaning service, a checklist keeps the scope tidy.
Who This Is For and When It Makes Sense
This checklist is for anyone moving out of a rented flat in Whetstone N20, but it is especially useful if you are short on time, have pets, have lived in the property for a while, or simply want to avoid the usual moving-out scramble. It is also sensible for tenants who have several rooms with mixed floor types, as those transitions often create cleaning gaps.
It makes sense to use this approach when:
- your tenancy agreement expects the property to be returned in a professionally cleaned condition
- you have visible build-up in the kitchen or bathroom
- you want to clean before inventory or check-out photos are taken
- you are moving on a tight deadline and need a room-by-room plan
- you want to compare doing it yourself with booking a specialist cleaner
It is also useful if you are moving from a furnished flat. Furnishings add extra layers: mattress marks, sofa dust, curtain lint, cabinet fingerprints. If that sounds familiar, you may also find it helpful to read the company's guide on washing velvet curtains safely before you decide what to tackle yourself.
Step-by-Step Guidance
The most reliable way to handle an end of tenancy clean is to work in phases. It sounds a bit methodical, yes, but that is exactly what helps when the clock is ticking.
1. Prepare the flat first
Remove bins, personal belongings, food, toiletries, cleaning leftovers, and anything that does not belong in the final inspection. Check cupboards, under beds, behind doors, and inside the freezer. People forget these spaces all the time, especially in a small flat where things get tucked away without much thought.
2. Open up airflow and light
If possible, ventilate the flat and switch on the lights before you start. Natural daylight shows dust and streaks more honestly than your eyes do at 8 p.m. with one tired lamp on. It is a small thing, but it makes a big difference.
3. Work from high to low
Dust shelves, light fittings, picture rails, and the tops of cupboards first. Then move down to switches, sockets, skirting boards, surfaces, and floors. This avoids the classic problem of cleaning a lower surface and then re-dusting it five minutes later. Annoying, but avoidable.
4. Tackle each room by zone
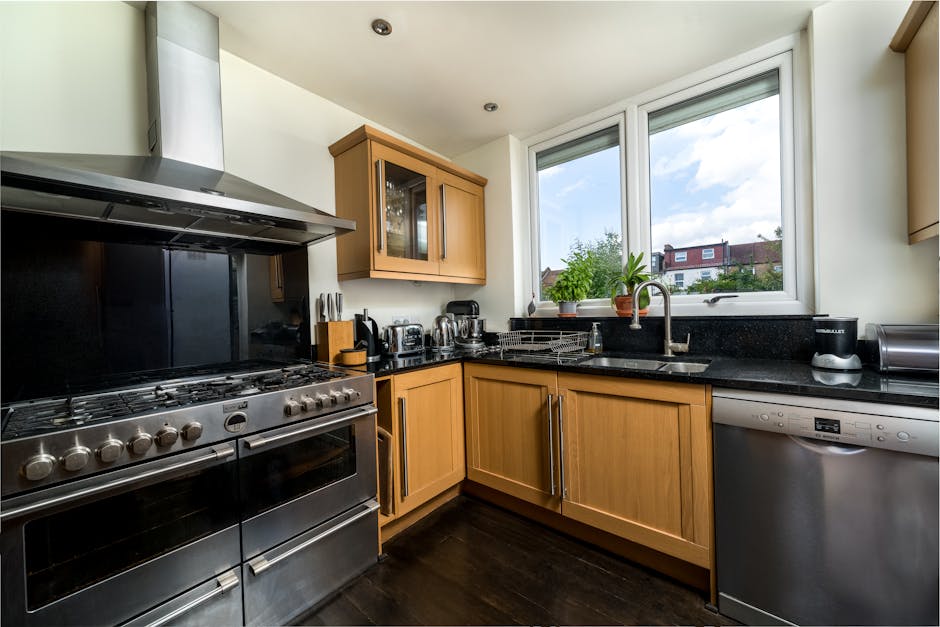
Split each room into zones: visible surfaces, hidden surfaces, fixtures, and floor areas. In the kitchen, for example, that means cupboard fronts, inside cupboards, splashbacks, appliances, worktops, and the floor. In the bathroom, it means tiles, taps, toilet base, shower screen, grout, mirrors, and vents.
5. Use the right cleaning method for each surface
Not all dirt responds to the same approach. Grease needs a degreaser or a suitable kitchen cleaner. Limescale needs attention around taps and showerheads. Dust needs cloths or vacuuming. Fabric surfaces may need specialist treatment. A one-size-fits-all method is rarely ideal, and that is where people go wrong.
6. Do a final inspection before you leave
Once the main work is done, walk the flat as if you were the letting agent. Open cupboards, check the oven handle, glance at the tops of doors, and look at the corners of each room. You will usually notice at least one last thing. Everyone does, even the organised ones.
Expert Tips for Better Results
Over time, the difference between an average clean and a proper end of tenancy clean usually comes down to a few habits. Nothing fancy. Just good discipline and a bit of patience.
- Start with the dirtiest problem areas early. Kitchens and bathrooms often take longer than expected, so give them enough time.
- Use microfibre cloths for finishing. They lift dust and reduce smearing on glass, chrome, and painted surfaces.
- Check under appliances and behind them. This is where dust, crumbs, and old grime like to hide.
- Leave enough drying time. Damp surfaces can look clean and still fail inspection if they streak or smell musty.
- Photograph the property after cleaning. Useful if there is later disagreement about condition. Keep the photos sensible and date-stamped if you can.
One small but important tip: do not wait until the final hour to notice a specialist issue. If the sofa needs more than a quick vacuum, or the rug has deep-set marks, sort that earlier. You can explore related support such as upholstery cleaning or the more focused rug cleaning tips for EN5 homes if soft furnishings are part of the move-out picture.
Common Mistakes to Avoid
Most end of tenancy cleaning problems come from rushing. That is the blunt answer. Here are the mistakes we see most often.
- Cleaning in the wrong order: If you do floors before dusty shelves, you are creating more work for yourself.
- Ignoring hidden areas: Inside ovens, behind toilets, under furniture, and the tops of cupboards are frequent problem spots.
- Using harsh products on the wrong surface: Some materials mark easily. Check carefully before applying anything strong.
- Forgetting bins and waste areas: A spotless kitchen still feels unfinished if the bin smells or the recycling area is neglected.
- Leaving marks on glass and chrome: Streaks are easy to miss in artificial light. Then the agent spots them instantly. Classic.
- Assuming "vacuumed" equals "cleaned": Floor vacuuming is only one part of the job, not the whole job.
Another common issue is underestimating how long the job will take. A compact flat can still be a full-day clean if it has built-up grease or limescale. So, to be fair, it is better to plan generously than to assume you will finish after lunch and spend the evening regretting it.
Tools, Resources and Recommendations
You do not need a van full of equipment to clean a flat properly, but having the right basics makes the job much easier. A sensible kit usually includes:
- microfibre cloths
- non-scratch sponges
- vacuum cleaner with attachments
- mop and bucket
- all-purpose cleaner suitable for the surface
- bathroom descaler
- degreaser for kitchen surfaces
- glass cleaner
- rubber gloves
- bin bags and fresh liners
It also helps to have a small step stool for top shelves and light fittings. Just use it carefully. Balance matters more than enthusiasm there. If you are planning a broader clean beyond the tenancy move, the company's spring cleaning service and one-off cleaning page may also be relevant for one-time refreshes in between tenancies or before marketing a property.
For readers who prefer a professionally managed clean, the wider services overview and pricing and quotes pages are useful starting points before booking anything. If you need local support quickly, you can also use the company's request a quote form or contact the team directly.
Law, Compliance, Standards, or Best Practice
In UK rentals, the exact cleaning requirement usually depends on the tenancy agreement and the condition recorded at move-in and move-out. That is the practical reality. It is not normally about making the flat look brand new; it is about returning it in a condition consistent with the contract, ordinary wear and tear excepted.
Because agreements vary, tenants should read their tenancy terms carefully before assuming what "clean" means for a specific property. For example, one landlord may expect professional carpet cleaning only if carpets were professionally cleaned at the start, while another may simply expect them to be vacuumed and stain-free. The safest approach is to follow the inventory, document your work, and keep receipts if you hire a cleaner.
Best practice also means being careful with safety. Use products as directed, keep rooms ventilated, and avoid mixing chemicals. That is basic, but basic is often where accidents are prevented. If you are hiring a company, it is reasonable to look at its health and safety policy, as well as its insurance and safety information. Those pages help you understand how the service approaches risk and responsibility.
For general terms and customer information, the site also provides a terms and conditions page and a privacy policy. Not glamorous reading, admittedly, but useful when you are booking services online and want to know where you stand.
Options, Methods, or Comparison Table
There are usually three ways to approach a move-out clean: do it yourself, hire a specialist service, or split the task between a basic clean and professional support for the hardest parts. Each has a place. The right answer depends on your time, budget, and how demanding the final condition needs to be.
| Approach | Best for | Pros | Cons |
|---|---|---|---|
| DIY cleaning | Low-budget moves, smaller flats, light use | Lower cost, full control, flexible timing | Time-consuming, easy to miss details, physically tiring |
| Professional end of tenancy clean | Tenants wanting a thorough finish or tight deadlines | Efficient, detailed, less stress, often better for inspections | Higher cost than DIY, must book in advance |
| Hybrid approach | Moderate budgets and mixed-condition flats | Targets tough jobs while keeping costs down | Needs clear planning and communication |
In many Whetstone N20 flats, the hybrid option is the sweet spot. You handle packing, decluttering, and light cleaning. Then a specialist deals with carpets, upholstery, or the deep kitchen clean. It is a sensible compromise, not a cop-out.
Case Study or Real-World Example
A recent move-out scenario in a two-bedroom flat in N20 went more smoothly because the tenant started with a checklist three days before handover. The first evening was for decluttering and rubbish removal. The second was for the kitchen and bathroom. On the final morning, they only had surfaces, floors, and a quick inspection left to do. No panic, no late-night scrubbing, and no "where did this dust come from?" moment under the bed.
The biggest time saver was not the cleaning products. It was the sequence. They cleaned top shelves before wiping counters, treated the bathroom limescale early so it had time to work, and saved floor cleaning for last. They also took photos of the oven, shower screen, and living room carpet after everything was done. That made the handover feel calm and straightforward.
It is a small example, but it reflects what usually works in real life. A clear plan beats heroic last-minute effort almost every time.
Practical Checklist
Use this as your room-by-room end of tenancy cleaning Whetstone N20 flat checklist. If you want the shortest useful version possible, this is it.
Before you start
- Remove all personal belongings
- Empty cupboards, drawers, and storage areas
- Dispose of rubbish and recycling
- Check meter areas, balconies, and utility spaces
- Gather cleaning products and cloths

Kitchen
- Clean inside and outside of cupboards
- Wipe worktops, splashbacks, and shelves
- Degrease hob, extractor, and surrounding surfaces
- Clean oven, trays, racks, and door glass
- Defrost and clean fridge and freezer if included
- Wipe handles, switches, and appliance fronts
- Wash sink, taps, and drain area
- Clean floor edges and under movable items
Bathroom
- Descale taps, shower heads, and screens
- Scrub toilet inside, outside, and behind the base
- Clean bath, shower tray, tiles, and grout
- Polish mirrors and chrome fittings
- Wipe cabinets, shelves, and storage
- Clean extractor fan and vents if accessible
- Mop floor thoroughly, including corners
Living room and bedrooms
- Dust all surfaces and skirting boards
- Clean light switches, sockets, and door handles
- Vacuum under furniture and in corners
- Clean wardrobes, shelves, and internal drawers
- Remove marks from walls where safely possible
- Vacuum carpets or arrange specialist cleaning if needed
- Check curtains, blinds, and soft furnishings
Hallways, stairs, and final details
- Dust bannisters, handrails, and ledges
- Clean front door interior and entry area
- Vacuum and mop all floors
- Check behind doors and around radiators
- Replace light bulbs if required by agreement
- Take final photos of cleaned rooms
Quick reminder: if carpets, rugs, or upholstery need more than a routine vacuum, build that into the plan early. That is where many move-outs get stuck.
Conclusion
A move-out clean does not need to become a weekend horror story. With a solid checklist, a sensible sequence, and a bit of patience, you can get a flat in Whetstone N20 ready for inspection without all the stress that usually tags along with moving day. The key is to be systematic, not frantic. Deal with the hidden spots, finish the details properly, and leave enough time for one final walk-through.
If your flat has carpets, soft furnishings, or a tougher-than-expected kitchen, bringing in specialist help can be a practical decision rather than an expensive one. And if you are still weighing things up, there is value in comparing the job against your own time and energy. Moving is already plenty. No need to make the cleaning part harder than it has to be.
Get a free quote today and see how much you can save.
For readers planning a broader property move or thinking about the local market, the site also covers related topics such as real estate insights for Barnet buyers, selling property in Barnet, and even a friendly look at whether Barnet is a nice area to live in. A useful bit of context, especially if your move-out is part of a bigger plan.


